

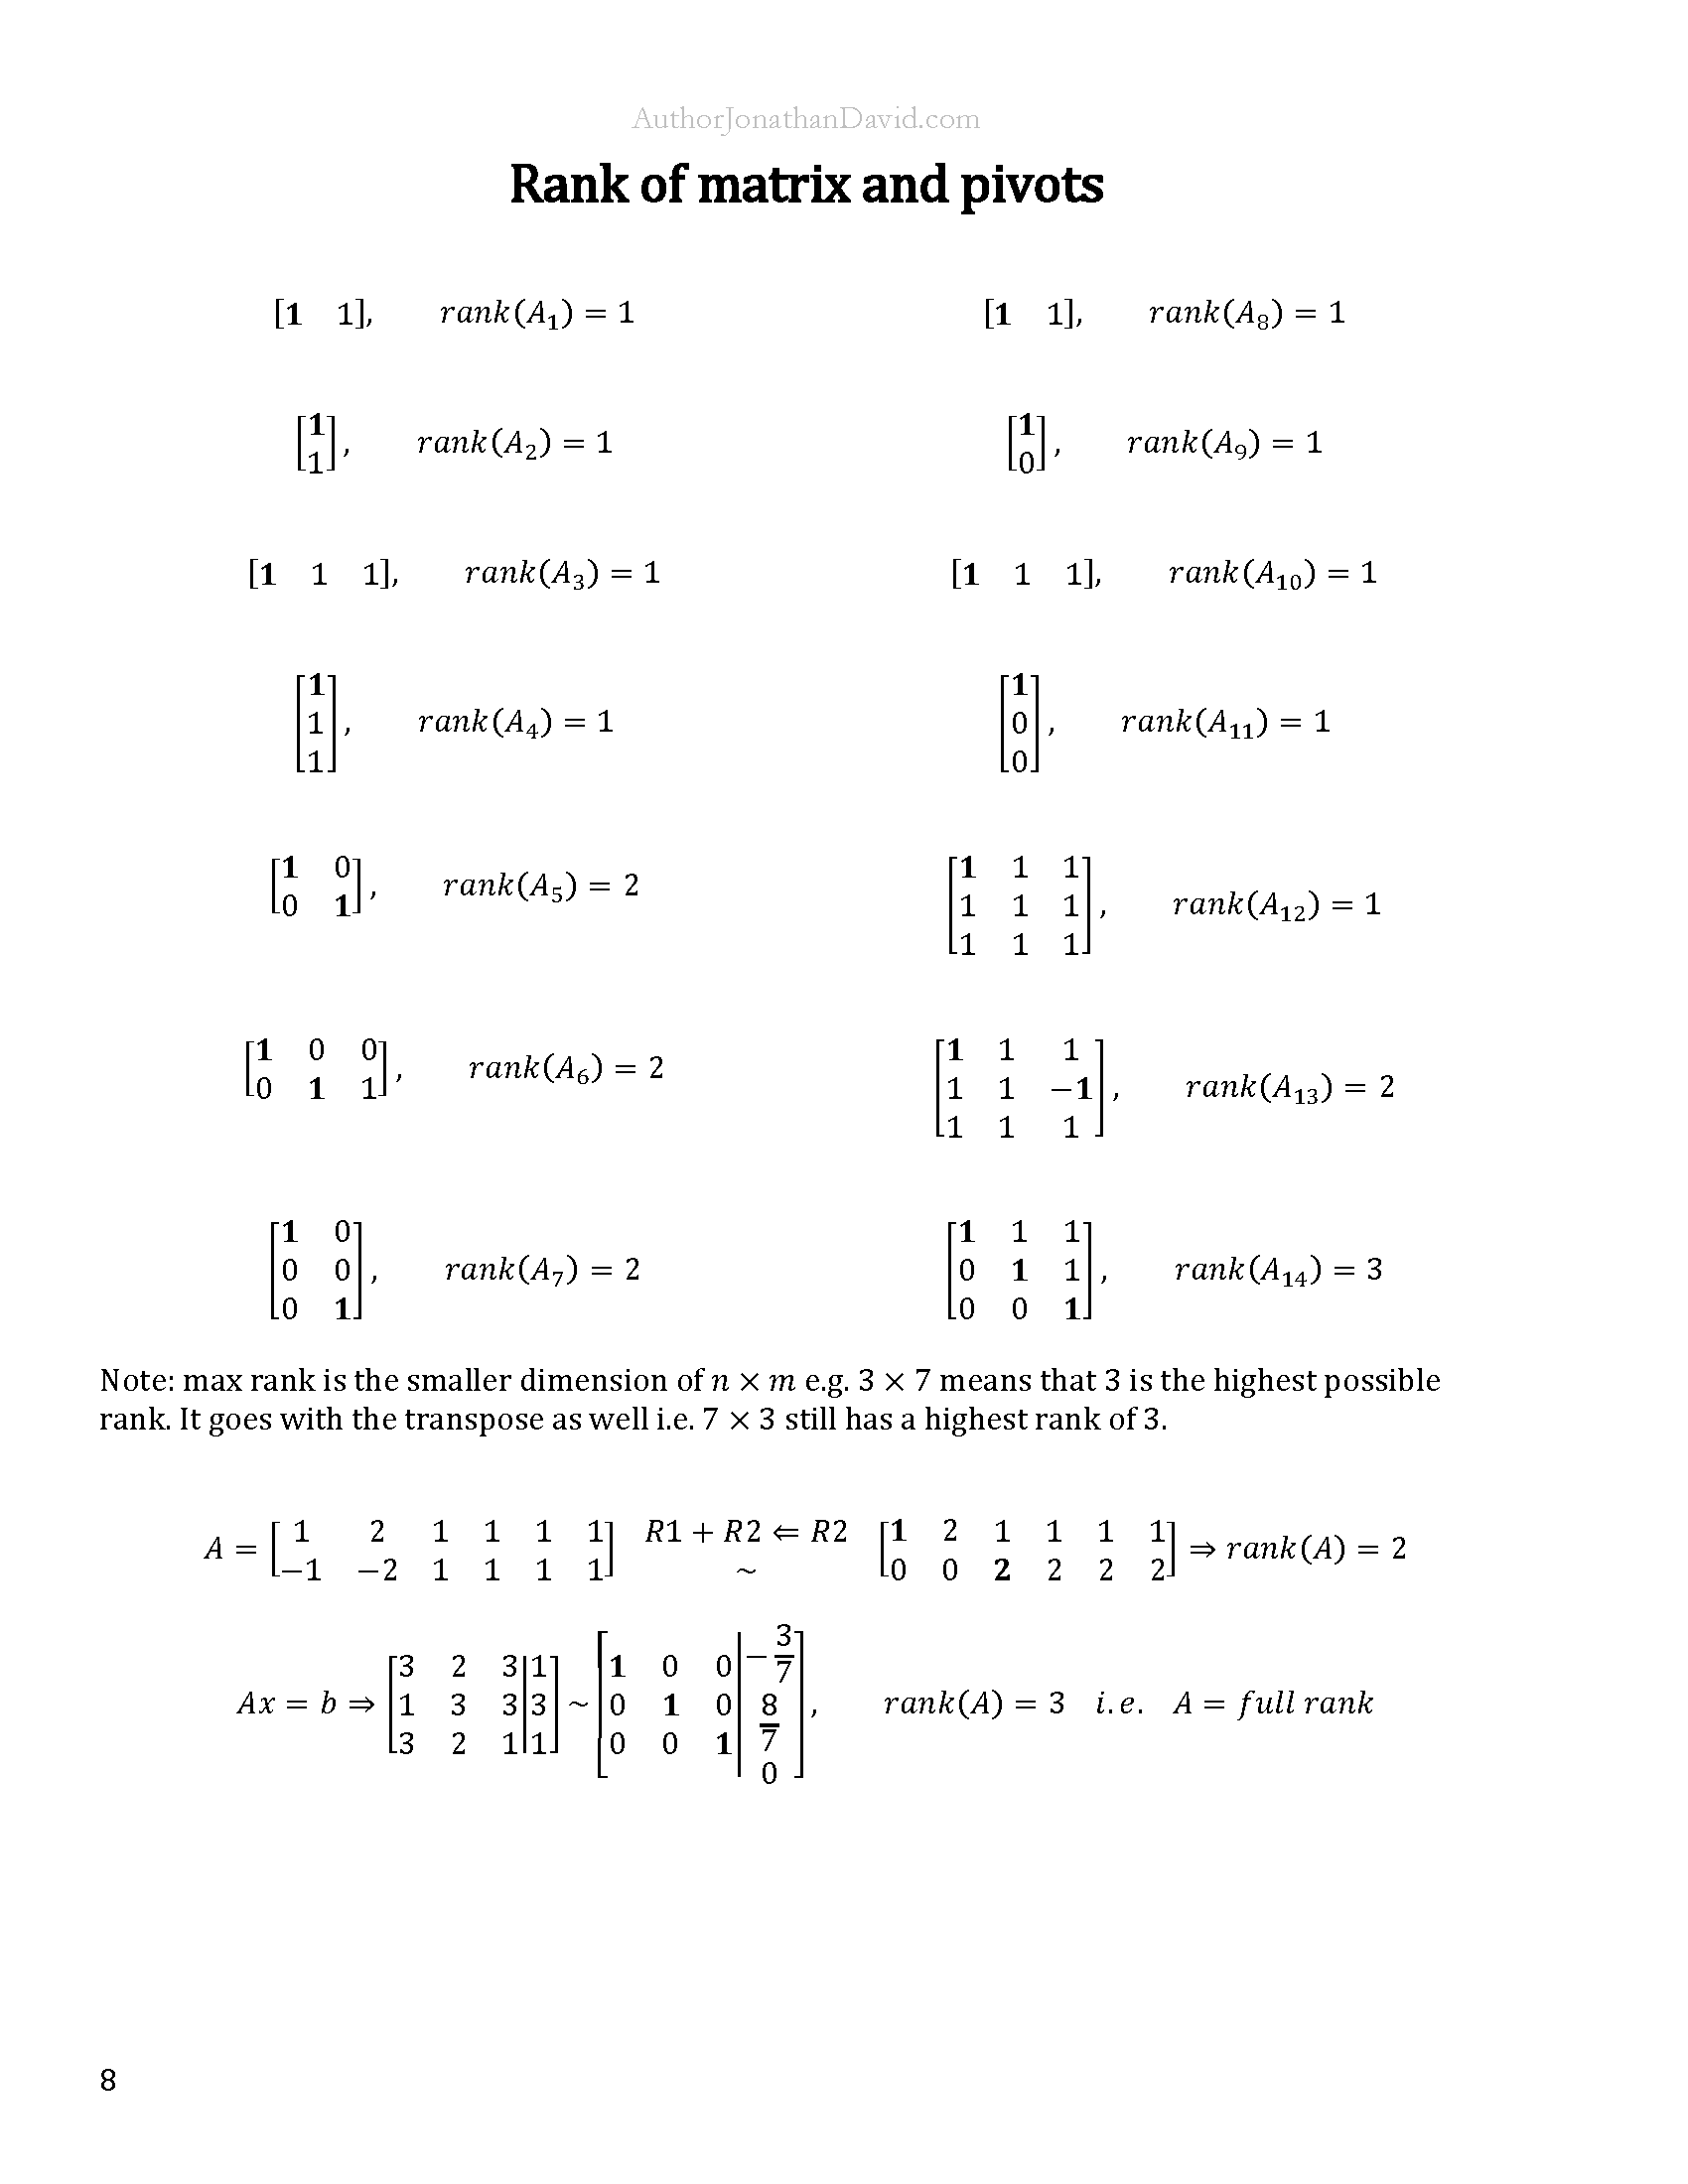
Rank of Matrix and Pivots | Linear Algebra This lesson is a sample from The Ultimate Crash Course for PLEM Majors series. Study linear algebra, differential equations, calculus, physics, and engineering mathematics with over 1,000 ad-free STEM lessons. Fourthwall Store | Payhip Store AuthorJonathanDavid.com Rank of matrix and pivots Note: […]
False Reality Publishing
153 posts

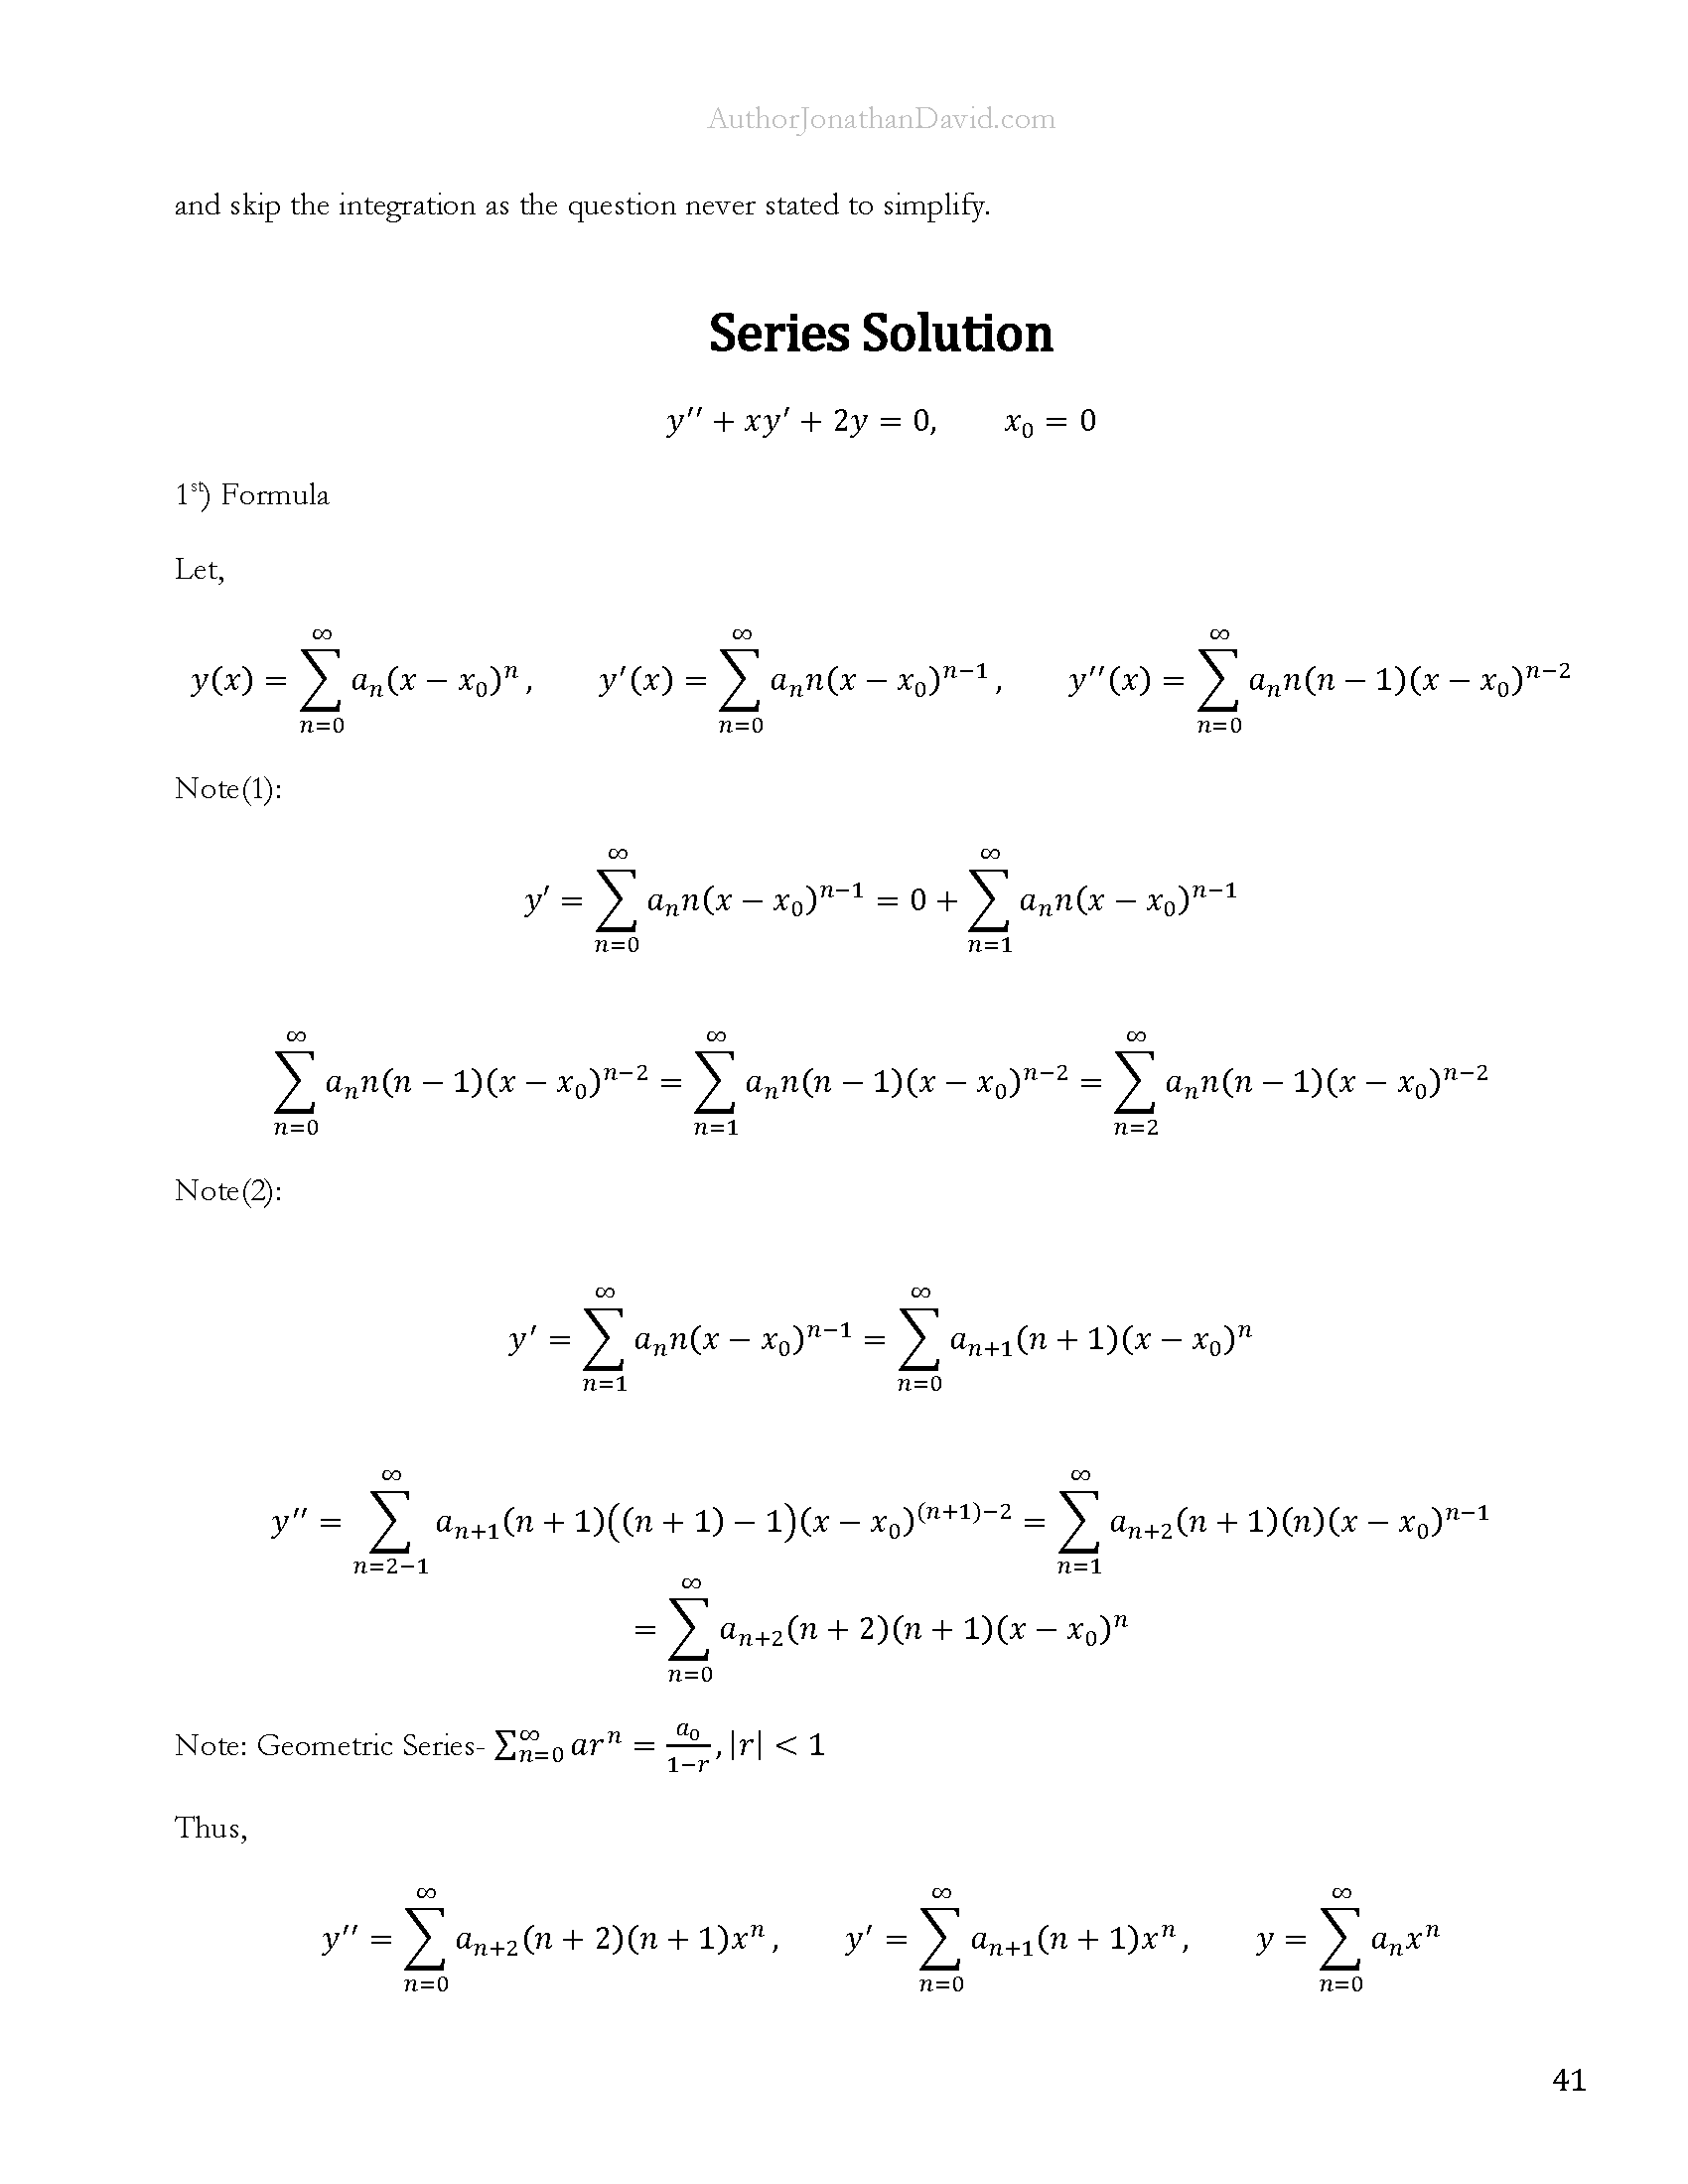
Series Solutions | Differential Equations Master differential equations, calculus, linear algebra, physics, and engineering mathematics through the P.L.E.M. Academy system with over 1,000 ad-free lessons. Access the complete STEM lesson ecosystem: Fourthwall Store | Payhip Store AuthorJonathanDavid.com and skip the integration as the question never stated to simplify. Series Solution […]

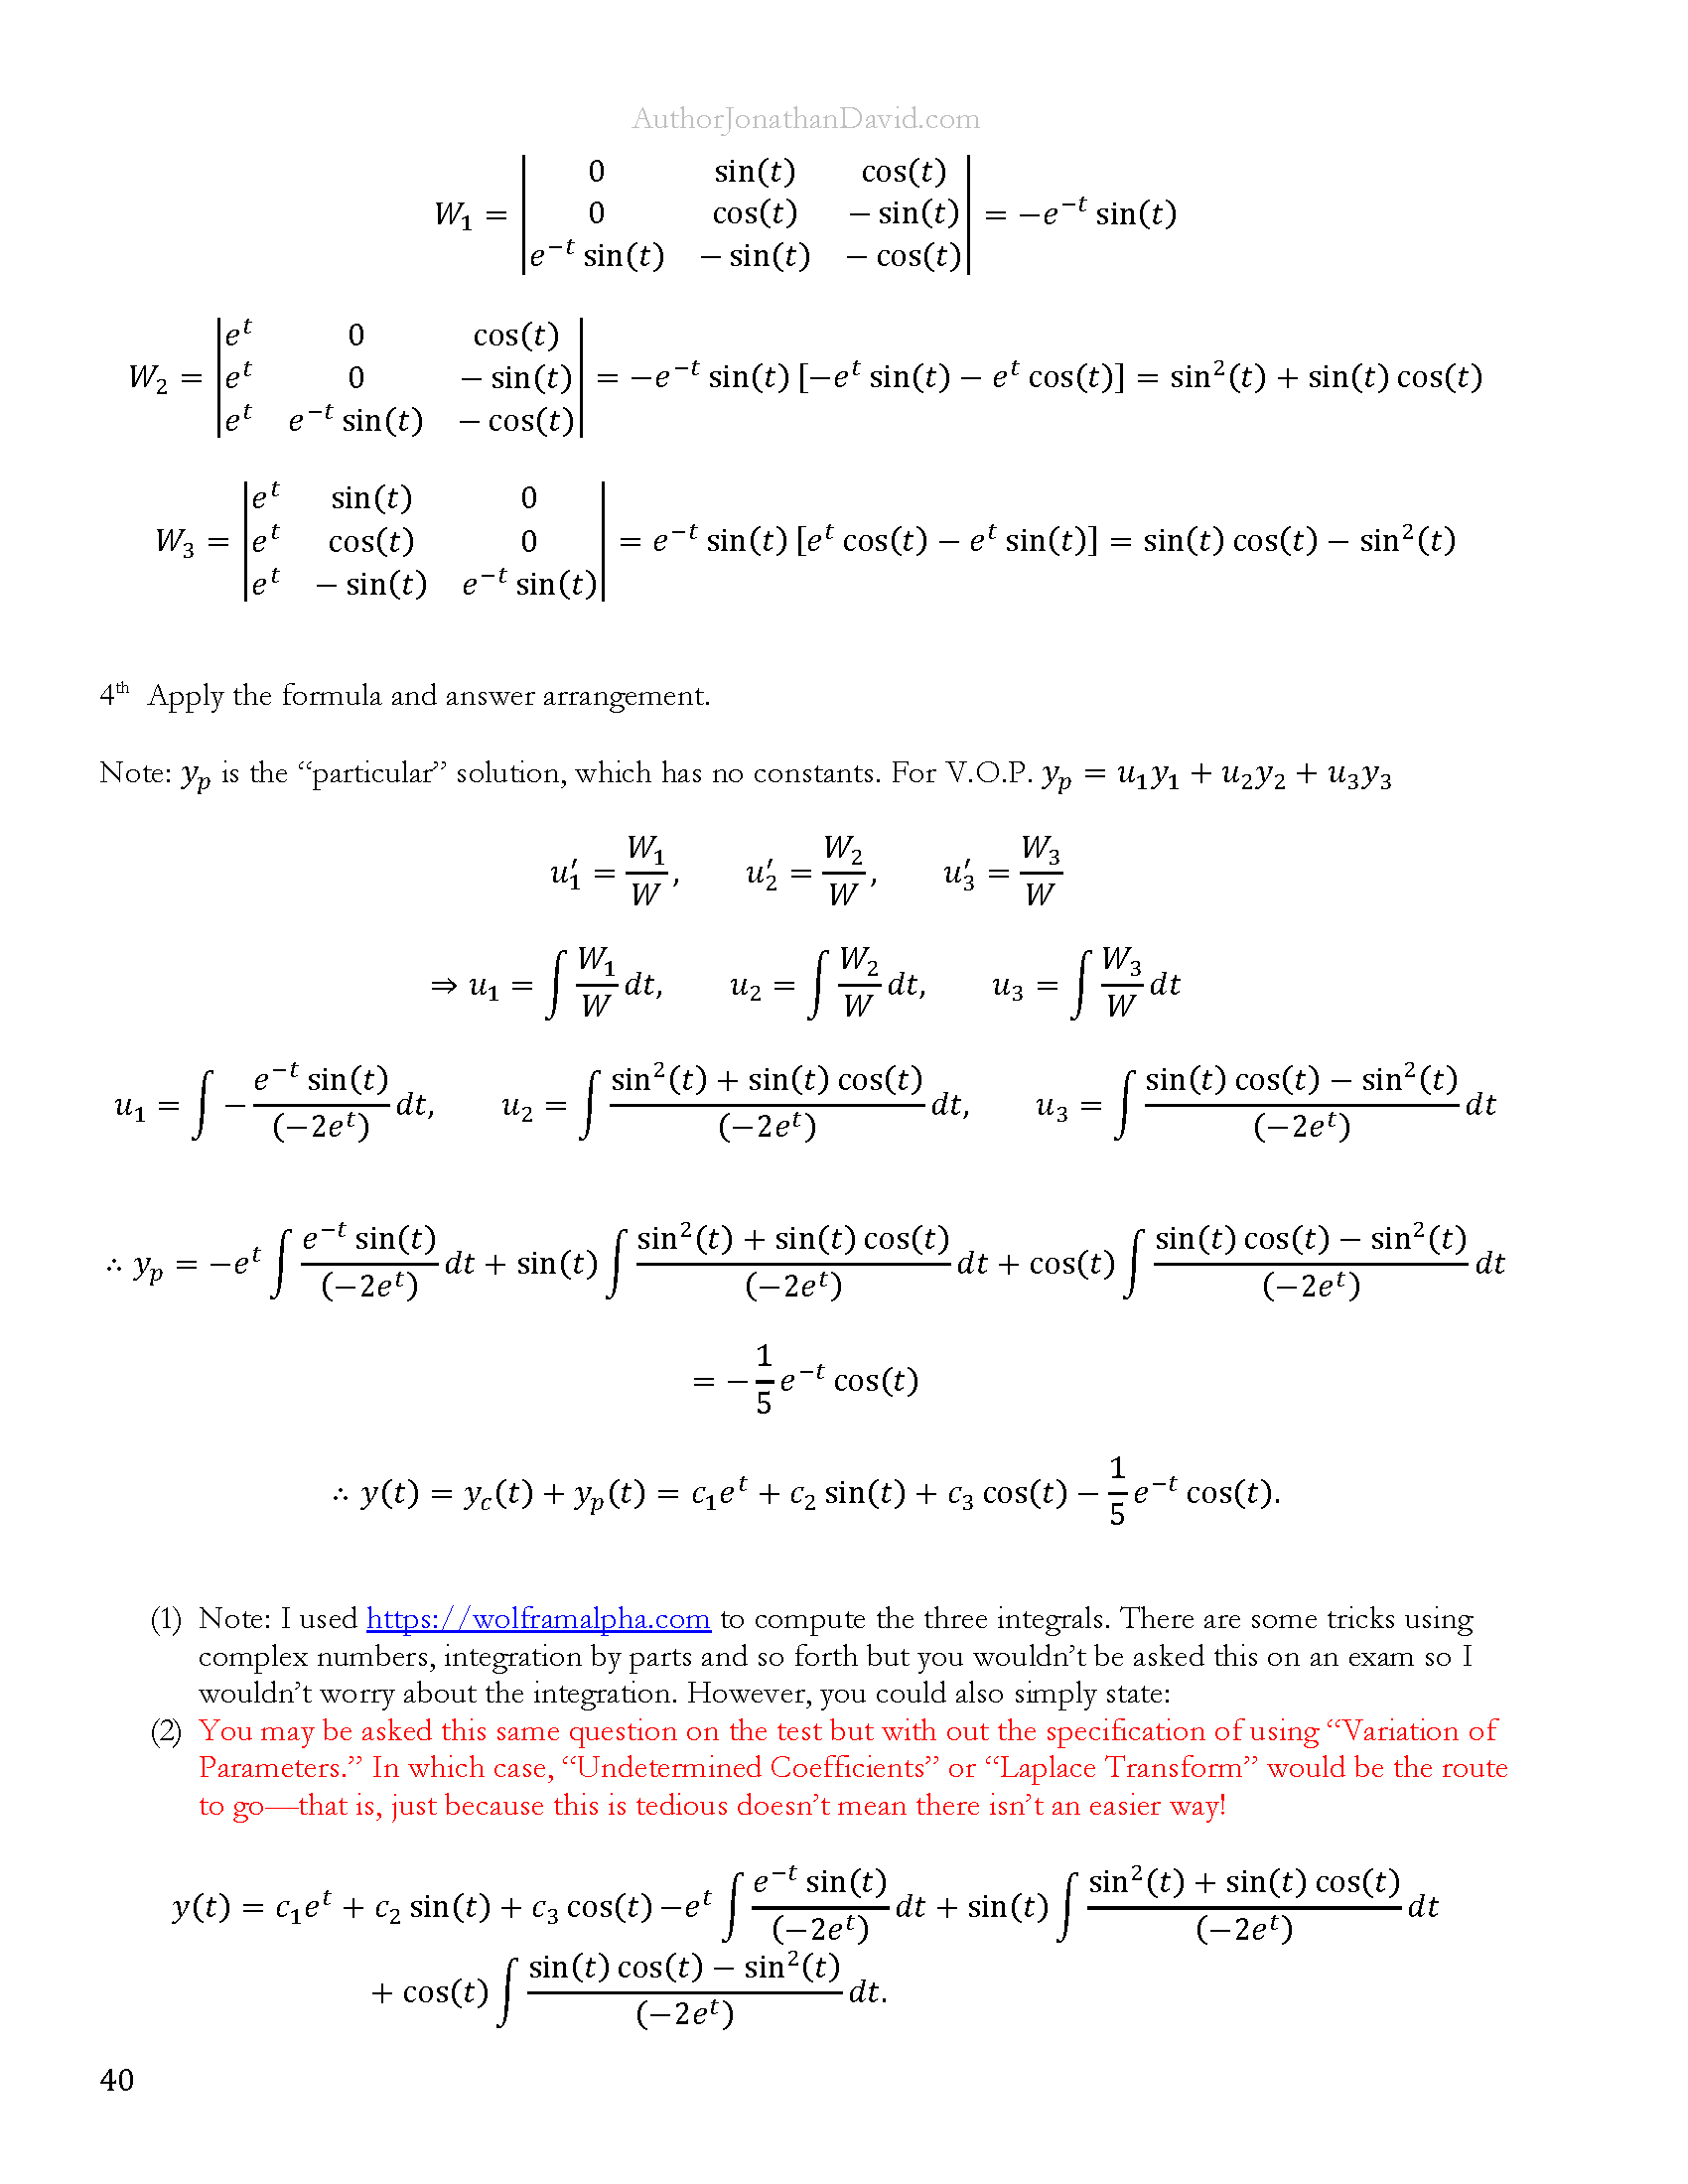
Differential Equations | Variation of Parameters Learn advanced differential equations methods through the P.L.E.M. Academy lesson system with over 1,000 ad-free STEM lessons included. Access the full lesson ecosystem: Fourthwall Store | Payhip Store Variation of Parameters | Differential Equations Example This lesson demonstrates the method of variation of parameters […]

The Ultimate Crash Course for PLEM Majors Get access to over 1,000 ad-free lessons covering mathematics, physics, engineering, programming, scientific communication, WordPress development, and resume building through the P.L.E.M. Academy ecosystem. Explore the crash course bundles and STEM resources: Fourthwall Store | Payhip Store Lesson 5: Site Layout, Boxed vs […]

The Ultimate Crash Course for PLEM Majors Get access to over 1,000 ad-free lessons covering mathematics, physics, engineering, programming, scientific communication, WordPress development, and resume building through the P.L.E.M. Academy ecosystem. Explore the crash course bundles and STEM resources: Fourthwall Store | Payhip Store Lesson 4: Site Identity, Logo, Title, […]

The Ultimate Crash Course for PLEM Majors Get access to the crash course bundles, STEM resources, and over 1,000 ad-free lessons included through the P.L.E.M. Academy ecosystem. Shop: Fourthwall Store | Payhip Store Lesson 3: Choosing Your Font for Your WordPress Theme In this lesson for the P.L.E.M. Academy Modern […]

The Ultimate Crash Course for STEM Majors A complete mathematics and physics preparation system for STEM majors covering proofs, number theory, calculus, differential equations, vector calculus, and advanced engineering mathematics. Master textbook learning, symbolic notation, proof writing, and higher mathematics communication through the P.L.E.M. Academy system. 1,000+ Lessons AuthorJonathanDavid.com Copyright […]

The Ultimate Crash Course for STEM Majors A complete mathematics and physics survival system for serious STEM majors covering proofs, number theory, calculus, differential equations, linear algebra, vector calculus, and advanced engineering mathematics. Get lifetime access to over 1,000 lessons and podcasts through the complete P.L.E.M. Academy system. 1,000+ Lessons […]

The Ultimate Crash Course for STEM Majors A complete crash course system for mathematics, physics, engineering, proof writing, symbolic notation, and higher STEM preparation. Learn algebra, calculus, differential equations, linear algebra, vector calculus, proofs, and scientific communication through textbook based lessons designed for serious STEM majors. 1,000+ Lessons AuthorJonathanDavid.com Copyright […]
FEATURED MODERN WEB DEVELOPMENT CERTIFICATE Learn WordPress development, technical communication, educational publishing, STEM formatting, and professional portfolio development through long-form guided lessons. Access over 1,000+ lessons and podcasts: theSTEMmajor.com PLEMacademy.com authorjond.com Crash Course Bundle How to Install and Activate the PLEM Academy WordPress Theme FEATURED VIDEO LESSON This lesson explains […]